Manage Your Site & Page SEO Information
One setting for your website that can be easily missed is your SEO information. This is because it’s not directly tied to building out the website itself (i.e. the pages, the content on your site, what you can actually see, etc.) and your website can technically exist without any SEO information. But we strongly advise against this! So if you care about your site being easily found online in search engines, keep reading. 😁
In this guide, we'll cover the following topics. Click on any one to jump ahead.
Note: While you can manage your Sitemap in your Site Settings, we explore this in our guide on how to Create Your Website Navigation Menu(s).
- What Is SEO (Search Engine Optimization)?
- 2 Levels Of SEO Information
- Manage Your Overall Site’s SEO Information
- Manage A Specific Page’s SEO Information
- Manage A Specific Page’s Social Previews
- Help With SEO Descriptions & Keywords
What Is SEO (Search Engine Optimization)?
SEO, or search engine optimization, is the process that search engines use to learn about your website and how pages on your site are connected. This helps tell search engines (like Google) what information to display when your website appears in search results, along with how to display that information.
SEO is also behind how easily your website can be found in search results. Depending on what words are used in your SEO titles and descriptions, along with what keywords you associate with your website (or specific pages) will help determine if your website appears in a particular search.
While your website can technically exist without any SEO information, we strongly recommend that you input SEO information in your overall Site Settings. This will be the default SEO information that search engines use while generating search results.
But you can also input SEO data for specific web pages. The information for that page will then display instead of the default SEO information should that specific page appear in the search results.
2 Levels Of SEO Information
As discussed briefly above, there are a two different levels of SEO information to consider:
- Your Overall Site’s SEO Information - This is the general information search engines use to showcase your site in the list of results (by use of keywords) and display a description of your site in the list of search results. This information is also the fallback that any published (and searchable) page you create uses if you don’t input any SEO information for individual pages.
- Individual Page SEO Information - This information is what search engines use to showcase an individual page in the list of results (by use of keywords) and display a description of that particular page in the list of search results. This information will trump what you input in your overall site’s SEO information.
Note: You do not need to edit the SEO information for individual pages. Typically, adding in the SEO information for your site in general is more than enough to provide you with sufficient reach and searchability in search engines. (After all, all your pages will default to using your overall site’s SEO information if you don’t customize each page’s SEO information.)
But if you want to go above and beyond for all your pages, or even just a few really important pages - perhaps like a big event that’s coming up - by all means, go for it!
Manage Your Overall Site’s SEO Information
To edit your overall site’s SEO information, click Manage and then on Site Settings. You should automatically be taken to the SEO tab. (Click here for a quick link.)

The first aspect to consider for your site’s SEO information is the Browser Title.

By default, Nucleus has your Browser Title in the format of Page Title | Name Of Your Church
To change what and how this information is displayed, click Edit.

In the field that appears, you can manually input your own information, or you can click Insert data and choose to insert a specific attribute (namely your page title and church name).

Next, you can write out a description of your church’s website that will appear alongside your SEO title in the search results. (This is your SEO Meta Description.)
If you’re coming from an old website, you might already have an SEO description you can copy and paste over. Simply search for your church’s website in a search engine, locate your church’s website in the search results, and see what SEO description appears.
Note: Because the SEO description is one of the first things people will see about your church website if they’re using a search engine, you may want to consider the opinions of other leaders in your church of what you want to include in your SEO description.
If you need any help with writing your site’s SEO description, we have some tips for you here.
Below your description is a field where you can input SEO keywords. Keywords are what search engines use to match with what people search for. While there are other factors at play whether your website will show up in search results (e.g. the location of where the person is searching from), keywords play a strong role in whether or not your site will appear in the search results.

You can add as many or as few keywords. Simply separate them with a comma. While you can add whatever words you think best describes your church, try to imagine what people might search for when looking for churches in their local area and include those words.
Below this is where you can upload a preview image. Many times when sharing a URL, there is a preview image that displays alongside the link. This is the image that will appear when people share your website’s URL (namely your homepage, or any page on your website that you haven’t added an image to for that page’s specific SEO information).

Simply drag and drop an image from your device, or click + Add image to open a browser to locate your desired image.
Once you’re done editing this page, click Save Changes.
Manage A Specific Page’s SEO Information
By default, any page that shows up in search results will use your overall site’s SEO information (namely your site’s SEO description and sharing image). But if you want a specific description and sharing image to appear for a particular page, you can easily do this while building/editing a page.
To begin, go to your Pages Panel (click here for a quick link) and click on a page to edit it.
You should be under the Create tab in the top menu, but if for whatever reason you’re not, click Create. Then, click on SEO in the left sidebar.

Here, you can customize your page’s SEO information.
First, you can check off if you don’t want this particular page to be indexed by search engines. This could be helpful if you’ve created a private page that you only want certain people to access, in which having the page be publicly available to find in search engines would make little sense.

Next, you can adjust how the Browser Title shows in search results.

By default, Nucleus has your Browser Title in the format of Page Title | Name Of Your Church
To change what and how this information is displayed, click Edit.

In the field that appears, you can manually input your own information, or you can click insert data and choose to insert a specific attribute (namely your page title and church name).

Next, you can write out a description of this specific page that will appear alongside your SEO title in the search results. (This is your SEO Meta Description.)


Below your description is a field where you can input SEO keywords. As explained above, keywords are what search engines use to match with what people search for. While there are other factors at play whether your website will show up in search results (e.g. the location of where the person is searching from), keywords play a strong role in whether this page will appear in the search results.

You can add as many or as few keywords. Simply separate them with a comma. While you can add whatever words you think best describes your church, try to imagine what people might search for when looking for the content that’s included on your page.
Below this is where you can upload a preview image. Many times when sharing a URL, there is a preview image that displays alongside the link. This is the image that will appear when people share the URL for this specific page.

Simply drag and drop an image from your device, or click + Add image to open a browser to locate your desired image.
Lastly, you can use the quick link below your sharing image to adjust your page’s URL slug/permalink. This is the part that shows up after your website’s custom domain in the address bar of your browser.
Most of the time you don’t need to change the URL slug, but if you’ve changed the title of your page and want the slug to match the new title, feel free to change it in your page’s settings.

Clicking Edit in Page Settings will take you to your page's settings where you can edit the URL slug and choose whether to automatically create redirects from the previous URL (which we always highly recommend having selected in almost every case).
If you edit changes here, don't forget to save your changes.

However, back in your SEO settings, all your changes are automatically saved. But you'll have to choose to accept or reject all your changes.
To do this, click Exit and select either Save & Close or Discard Changes.

Manage A Specific Page’s Social Previews
Similar to how you can input SEO information for a specific page that search engines will use to present that information to people should that page show up in search results, you can input information for a specific page that social media platforms will display whenever that page’s URL is shared on those platforms.
By default, any time you share a page’s URL on a social media platform, it will default to either that page’s SEO information or your overall site’s SEO information (depending on if you’ve edited your page’s SEO information or not). But you’re more than welcome to add in unique information that will be displayed on social media platforms when your page is shared there - specifically for Facebook and Twitter.
To begin, go to your Pages Panel (click here for a quick link) and click on a page to edit it.
You should be under the Create tab in the top menu, but if for whatever reason you’re not, click Create. Then, click on Social Previews in the left sidebar.
Here, you can click Customize to change what information is displayed on social media platforms.

Here, you’ll see two different sections: one for Facebook and one for Twitter. Inputting information here means that if your page’s URL is shared specifically on Facebook or Twitter, those platforms will use the information entered in these particular fields instead of what's input in your SEO information.
To edit either of these sections, simply enter how you want your page’s title to display, along with a description that is specific to this page.

Below those two fields, you can upload a social preview image. This is the image that will appear when people share the URL for this specific page.

Simply drag and drop an image from your device, or click + Add image to open a browser to locate your desired image.
All your changes are automatically saved. But you'll have to choose to accept or reject all your changes.
To do this, click Exit and select either Save & Close or Discard Changes.

Help With SEO Descriptions & Keywords
If you’re having difficulty coming up with your own SEO description and keywords, you can always try using an AI tool like ChatGPT to help provide you with inspiration.
For instance, below is an example of how you can prompt ChatGPT to generate both an SEO description and keywords for your overall site’s SEO information.
Simply ask the AI to act as an SEO specialist who writes SEO meta descriptions and keywords for church websites. Then provide it with your specific web URL, the name of your church, and the location of your church.
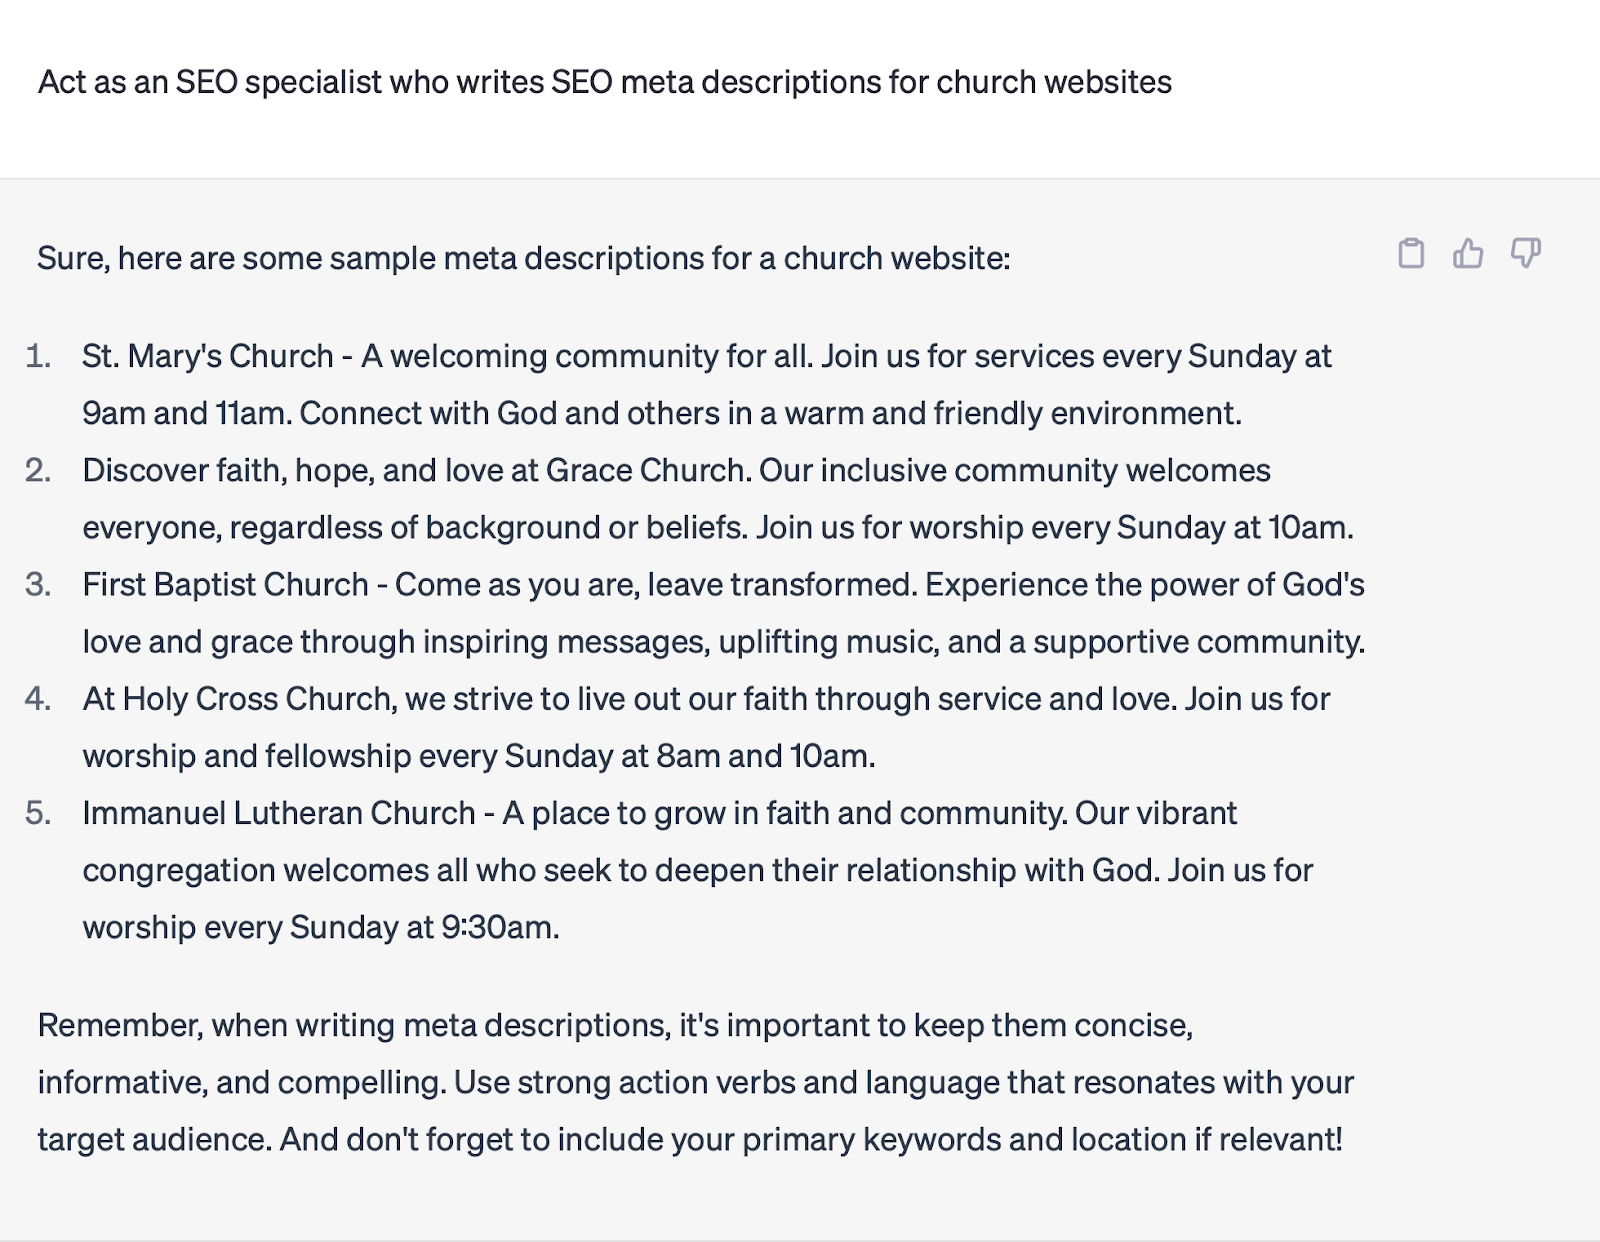
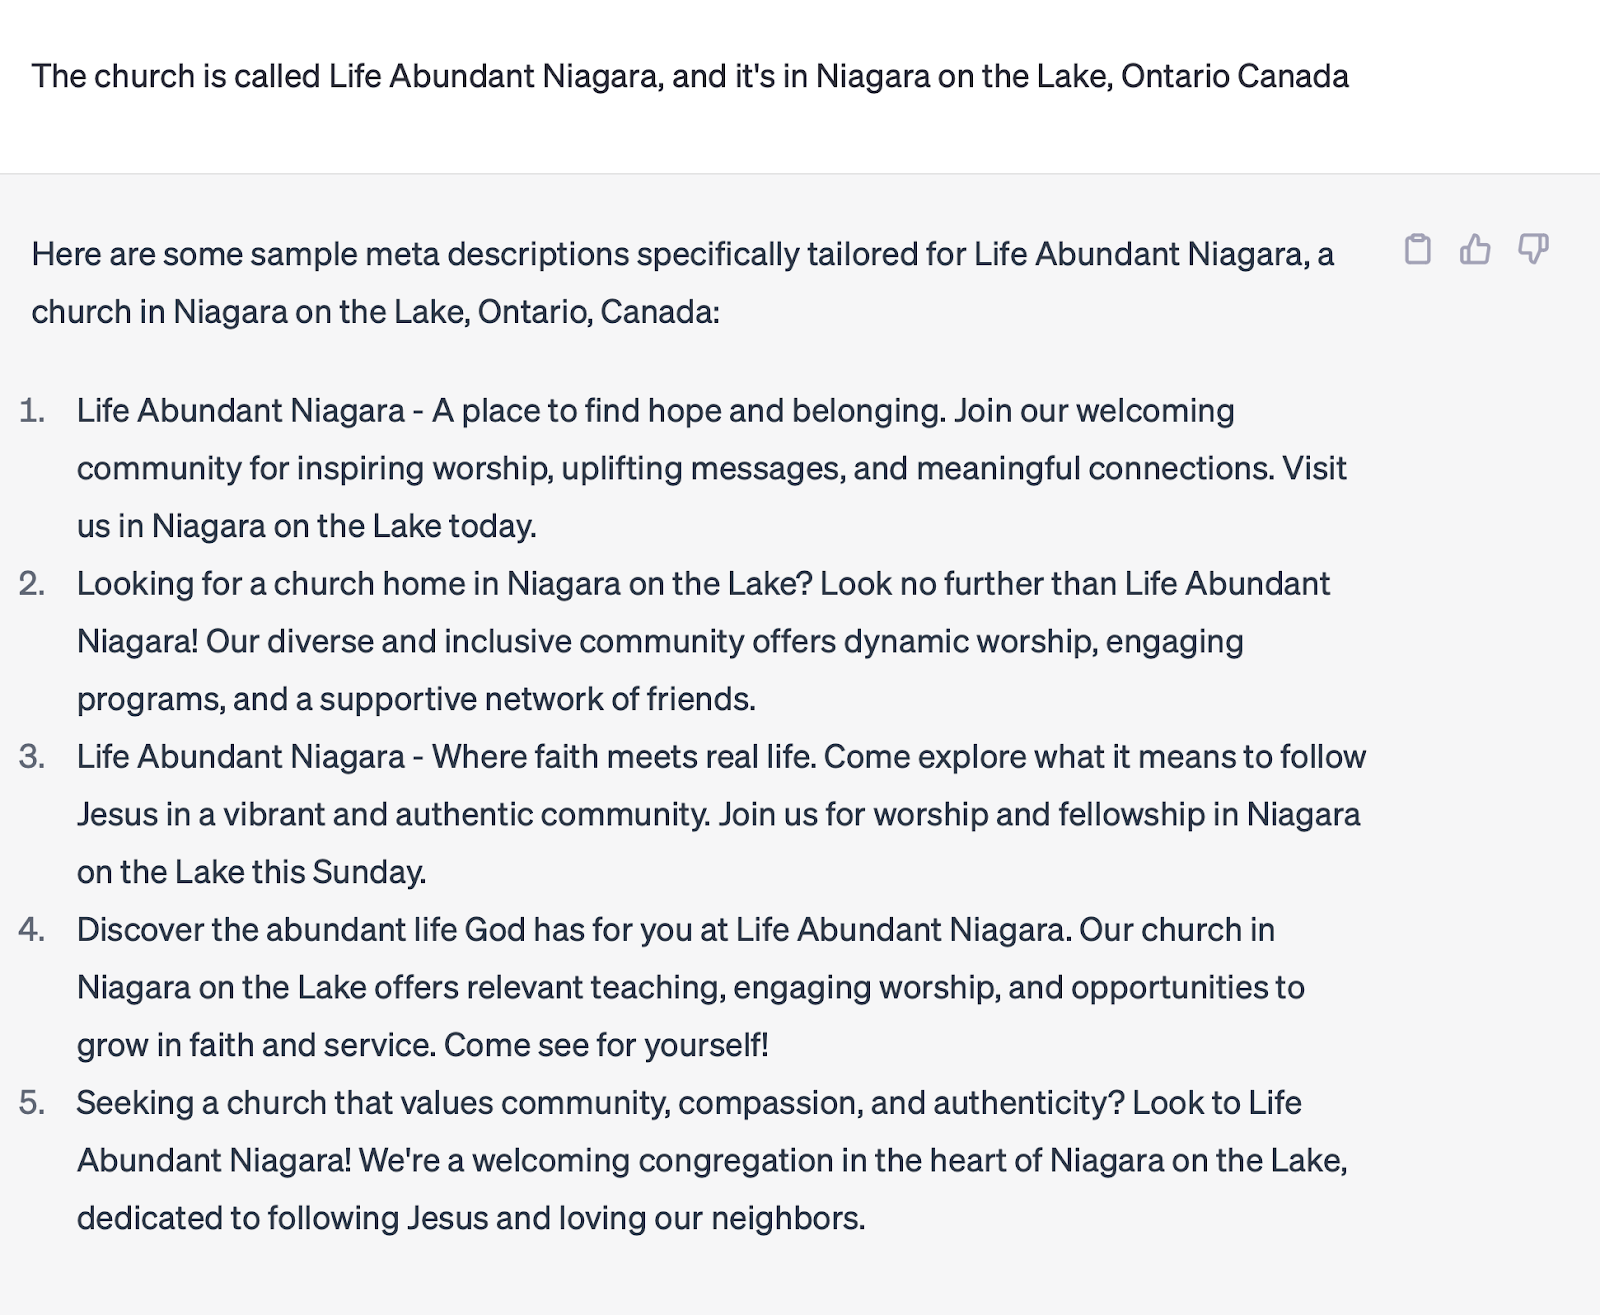
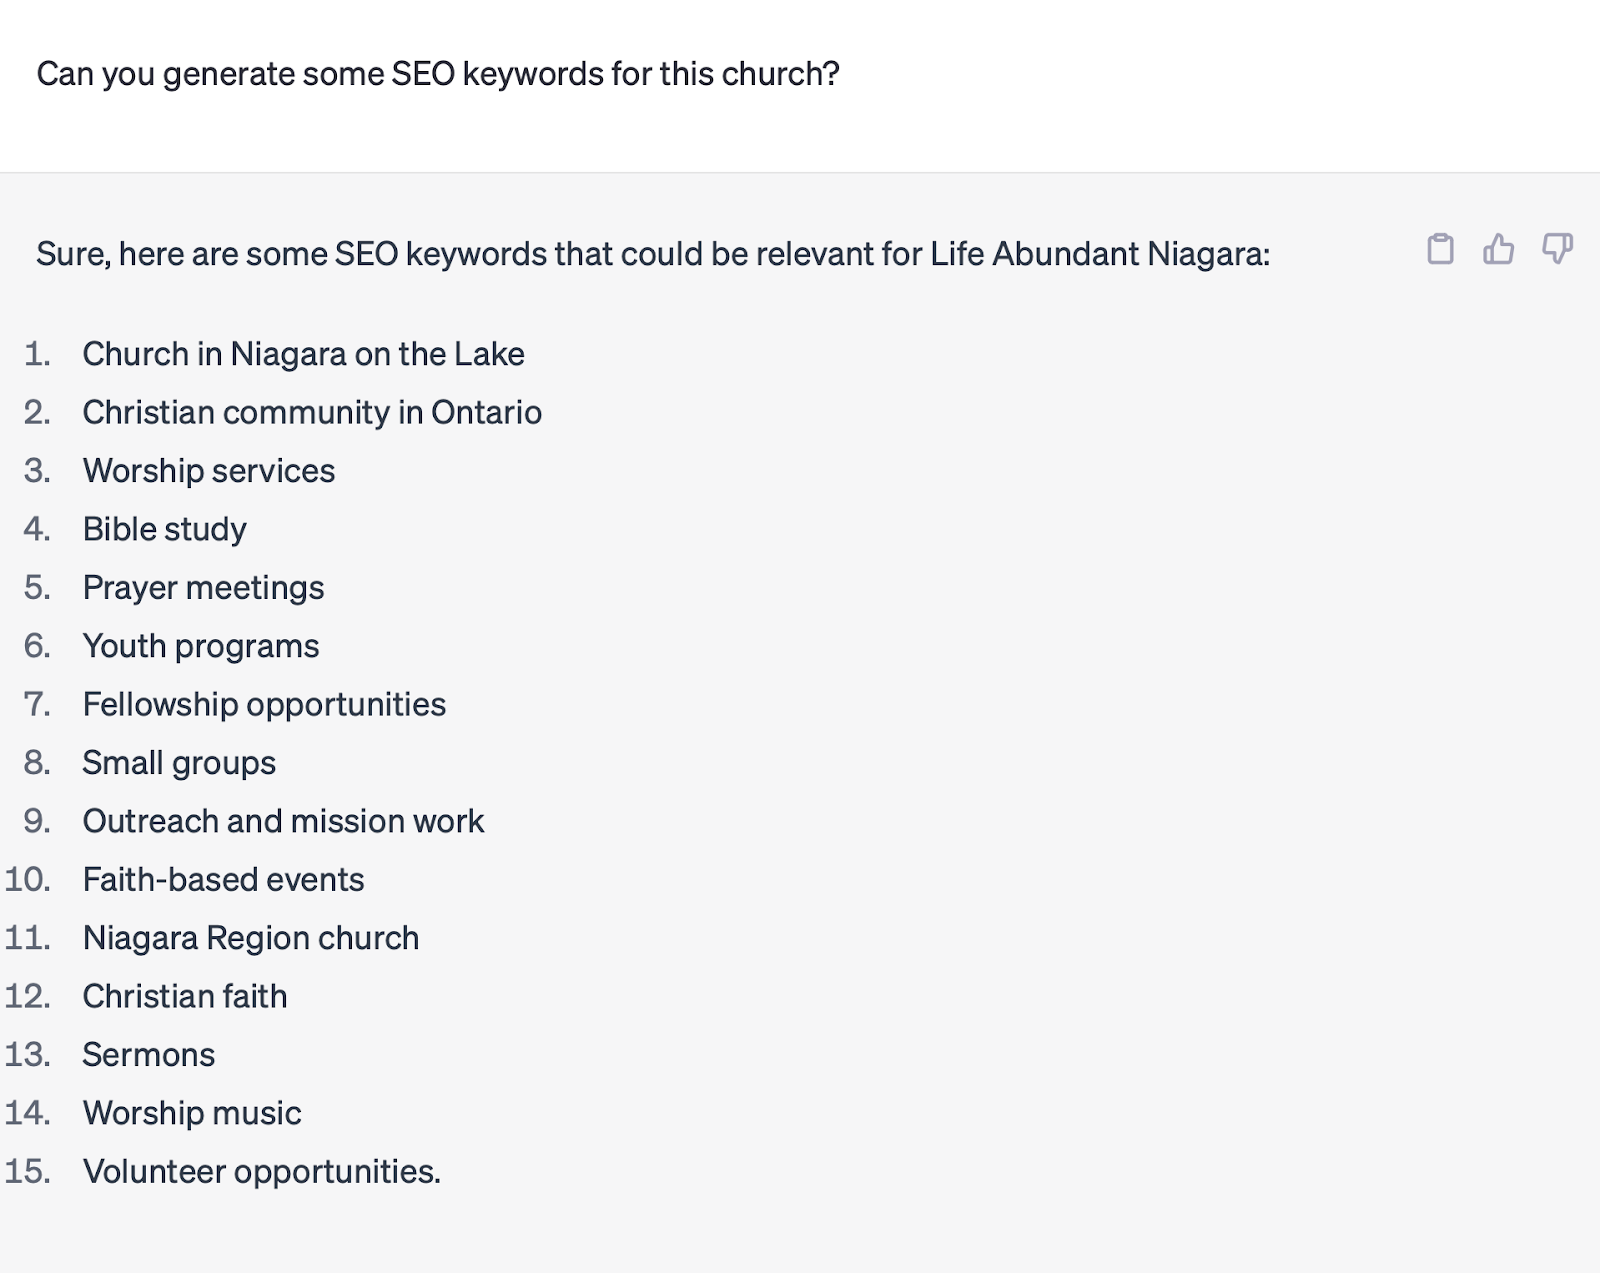
While you’re more than welcome to copy and paste what ChatGPT generates for you (after all, no one is checking you for plagiarism with your SEO information 😅), feel free to take inspiration from the examples provided to construct your own.
What Next?
As hopefully was made clear, SEO is a super important component to your website if you want people to easily find your church’s website searching online using platforms like Google. And while you can add in SEO information for each individual page of your website, making sure that you at least have SEO information in your overall Site Settings is usually more than enough to make your site visible on search engines 😊
But don’t forget about these other settings you might have missed!